


09/11/2014
in Quality
Automatic Code Review with SonarQube and Jenkins Part 2/2
Table of Contents
Following the first part of this post you can improve your code quality even further by extending the automated code review system with SonarQube analysis. You only need to perform a few modifications to SCM-Manager, Jenkins and SonarQube. In the first part of this article we already showed you the necessary configuration of SCM-Manager and Jenkins.
Code Reviews with SonarQube
With SonarQube you can extend the automatic code review system. You can define code metrics that you want your project to be checked for. For each metric you can define limits for warnings and errors. In addition to the configuration of the first part, Jenkins will also mark builds as failed if there are errors in the SonarQube analysis.
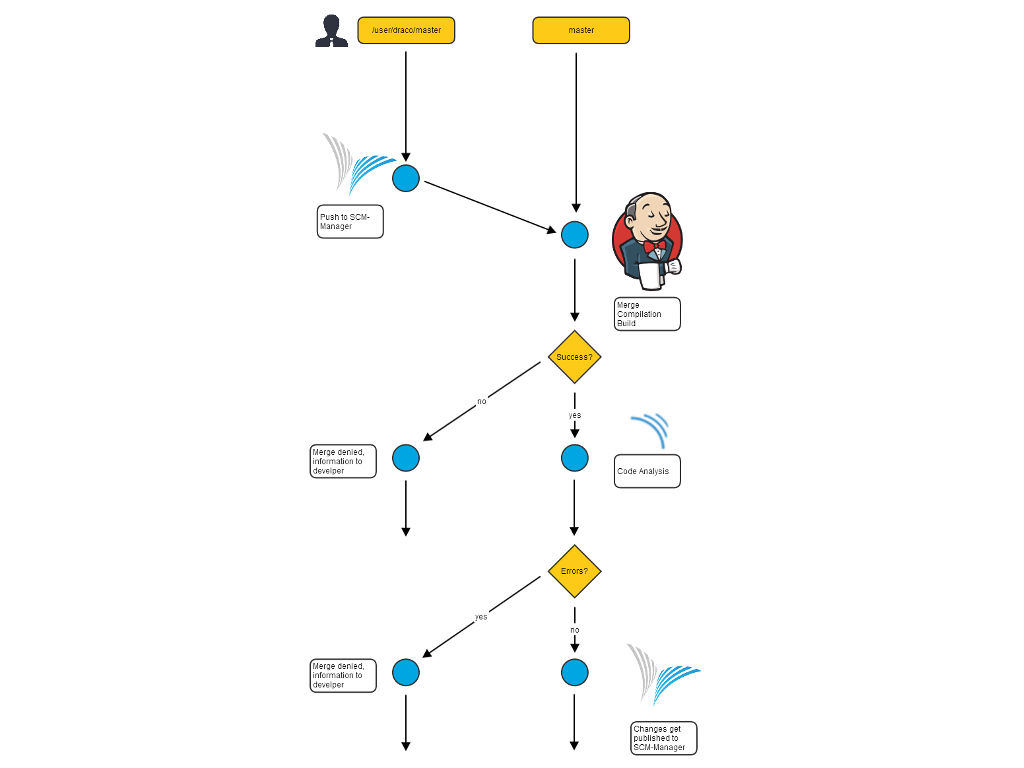
If the build in Jenkins succeeds, the analysis by SonarQube is invoked. The status of the SonarQube analysis will be displayed in the pull request at the analysis statusbar.
Implementation for SonarQube and Jenkins
To extend the code review process by connecting SonarQube there are only a few modifications to the Jenkins project and to SonarQube itself necessary.
Jenkins configuration
As for the Jenkins configuration, you only need to include a respective build-step in your Jenkinsfile.
If you want to add Sonar manually in Jenkins, you need to switch to the Manage Jenkins tab on the left menu bar and then select Tools in the System Configuration section. Afterward you can add a SonarQube scanner in the section SonarQube Scanner installations.
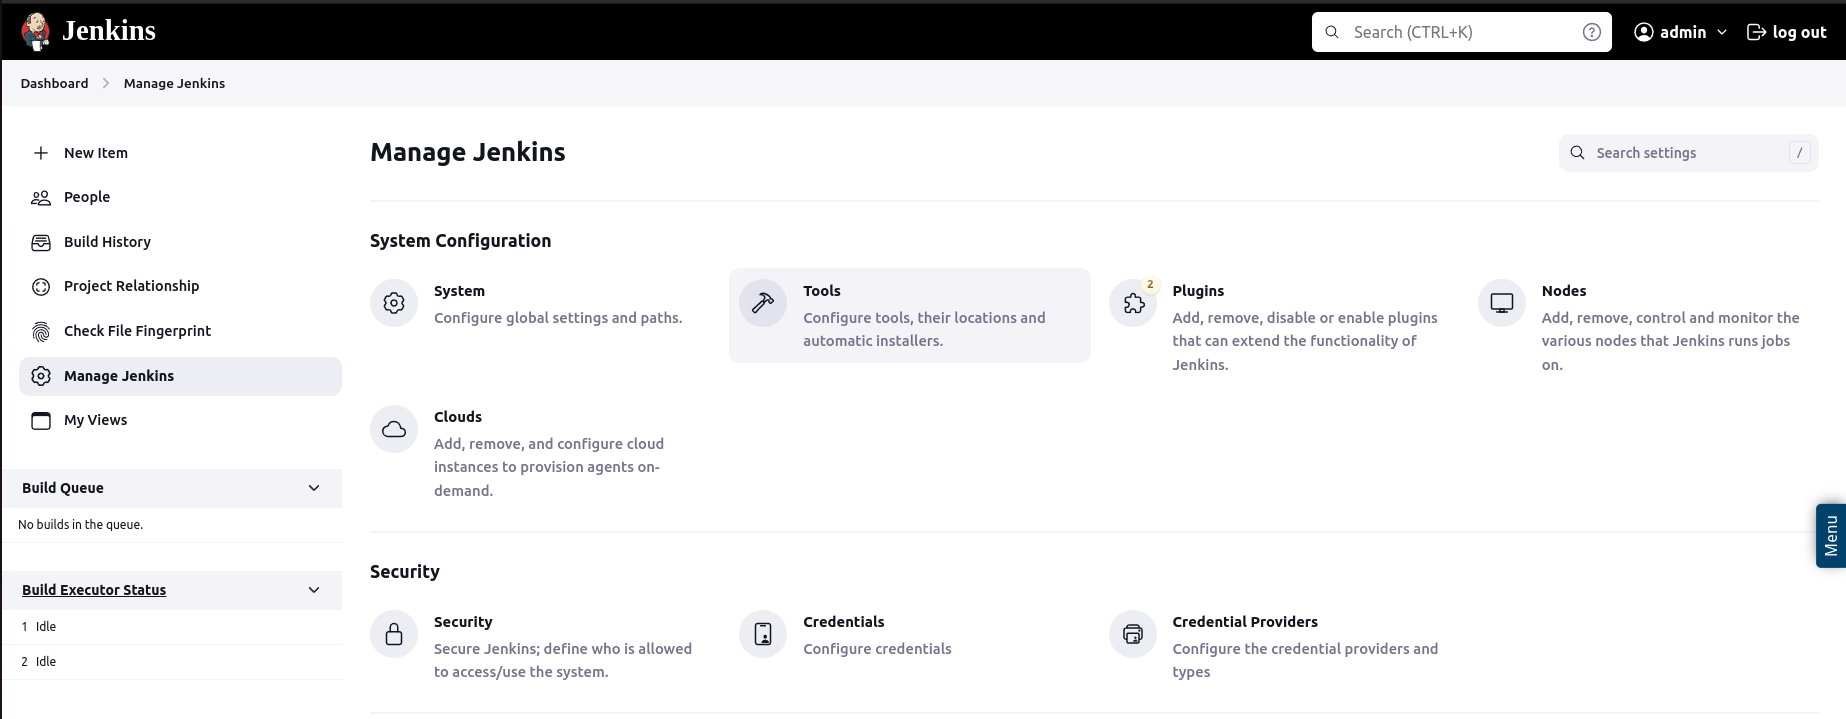
All previous modifications to Jenkins from part 1 stay untouched.
SonarQube Configuration
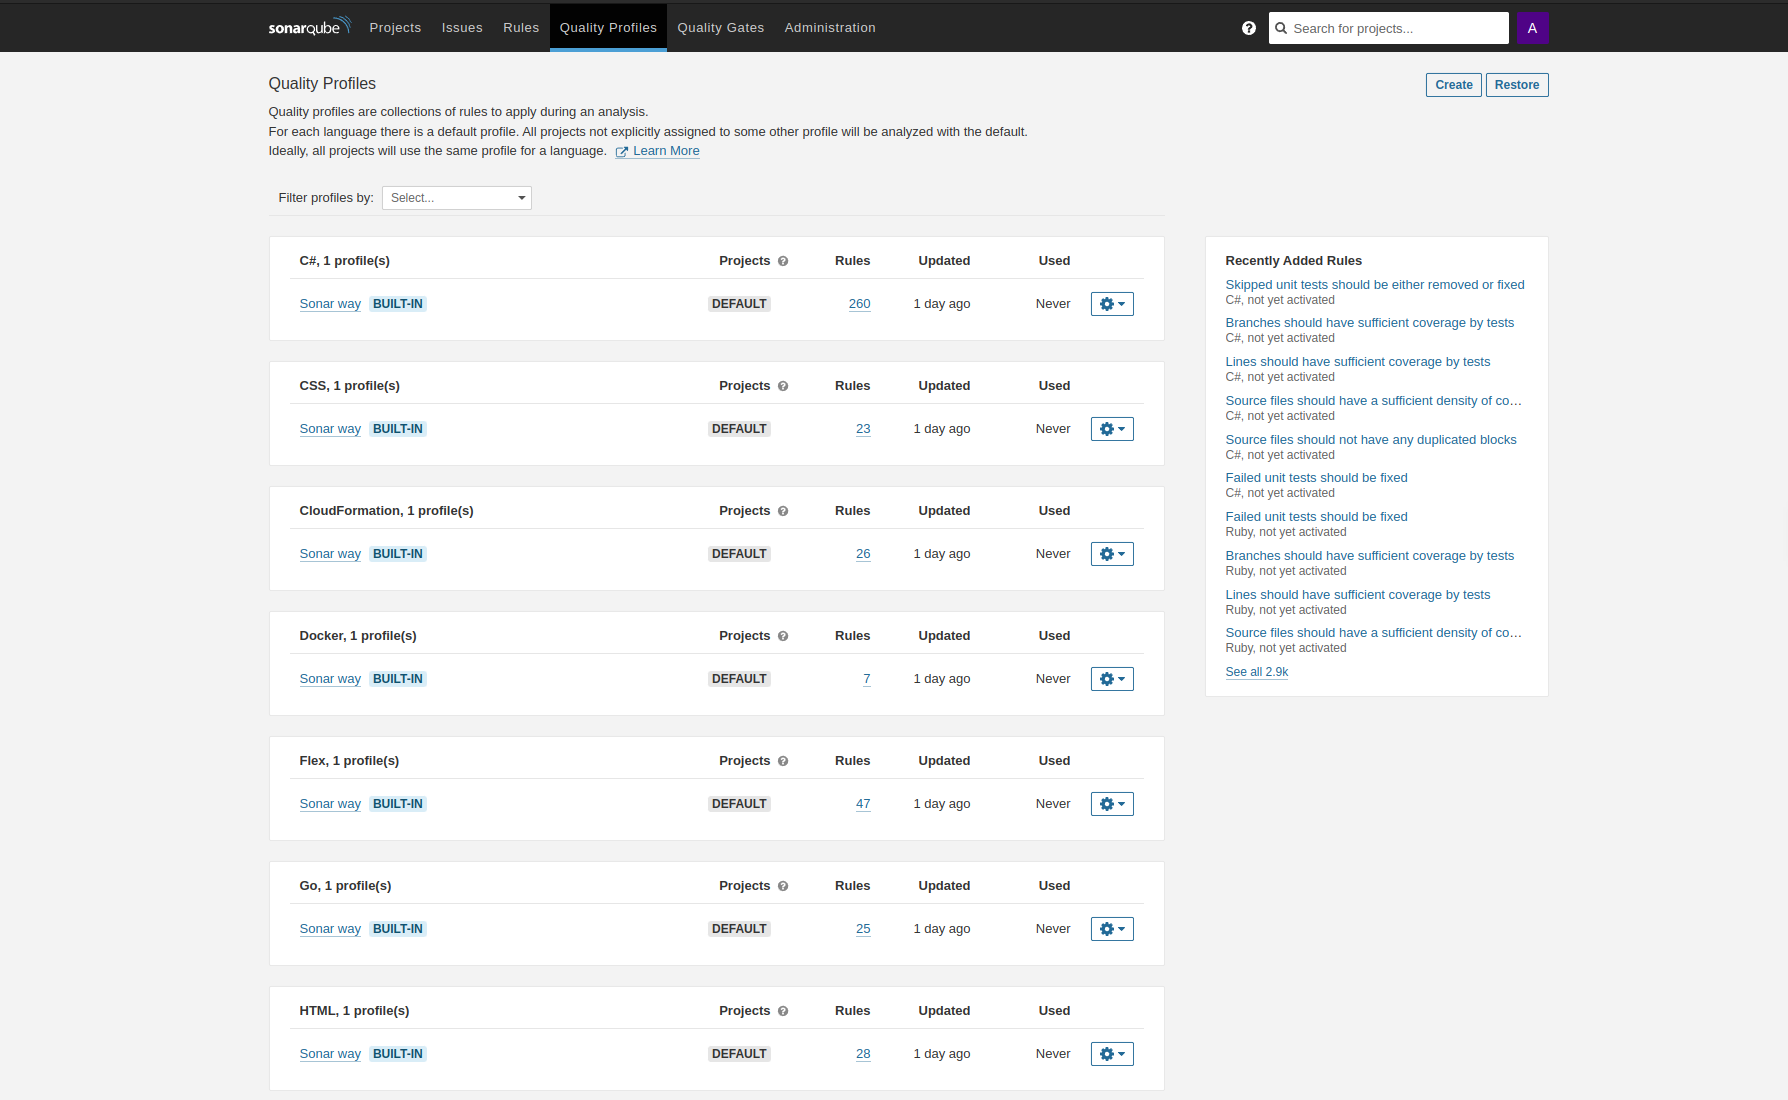
Basic settings for metrics and rules are set on SonarQube. To do this, you must first enter the relevant project in the Projects tab. You can then add quality rules in the Quality Profiles tab. The quality profiles are a series of rules that can be selected specifically for each programming language.
After that navigate to the Quality Gates tab. There you can add the metrics you want to use. A default set of metrics is already built-in by SonarQube (“sonar way”), with metrics such as Coverage, Percentage of duplicated lines or Security Rating.
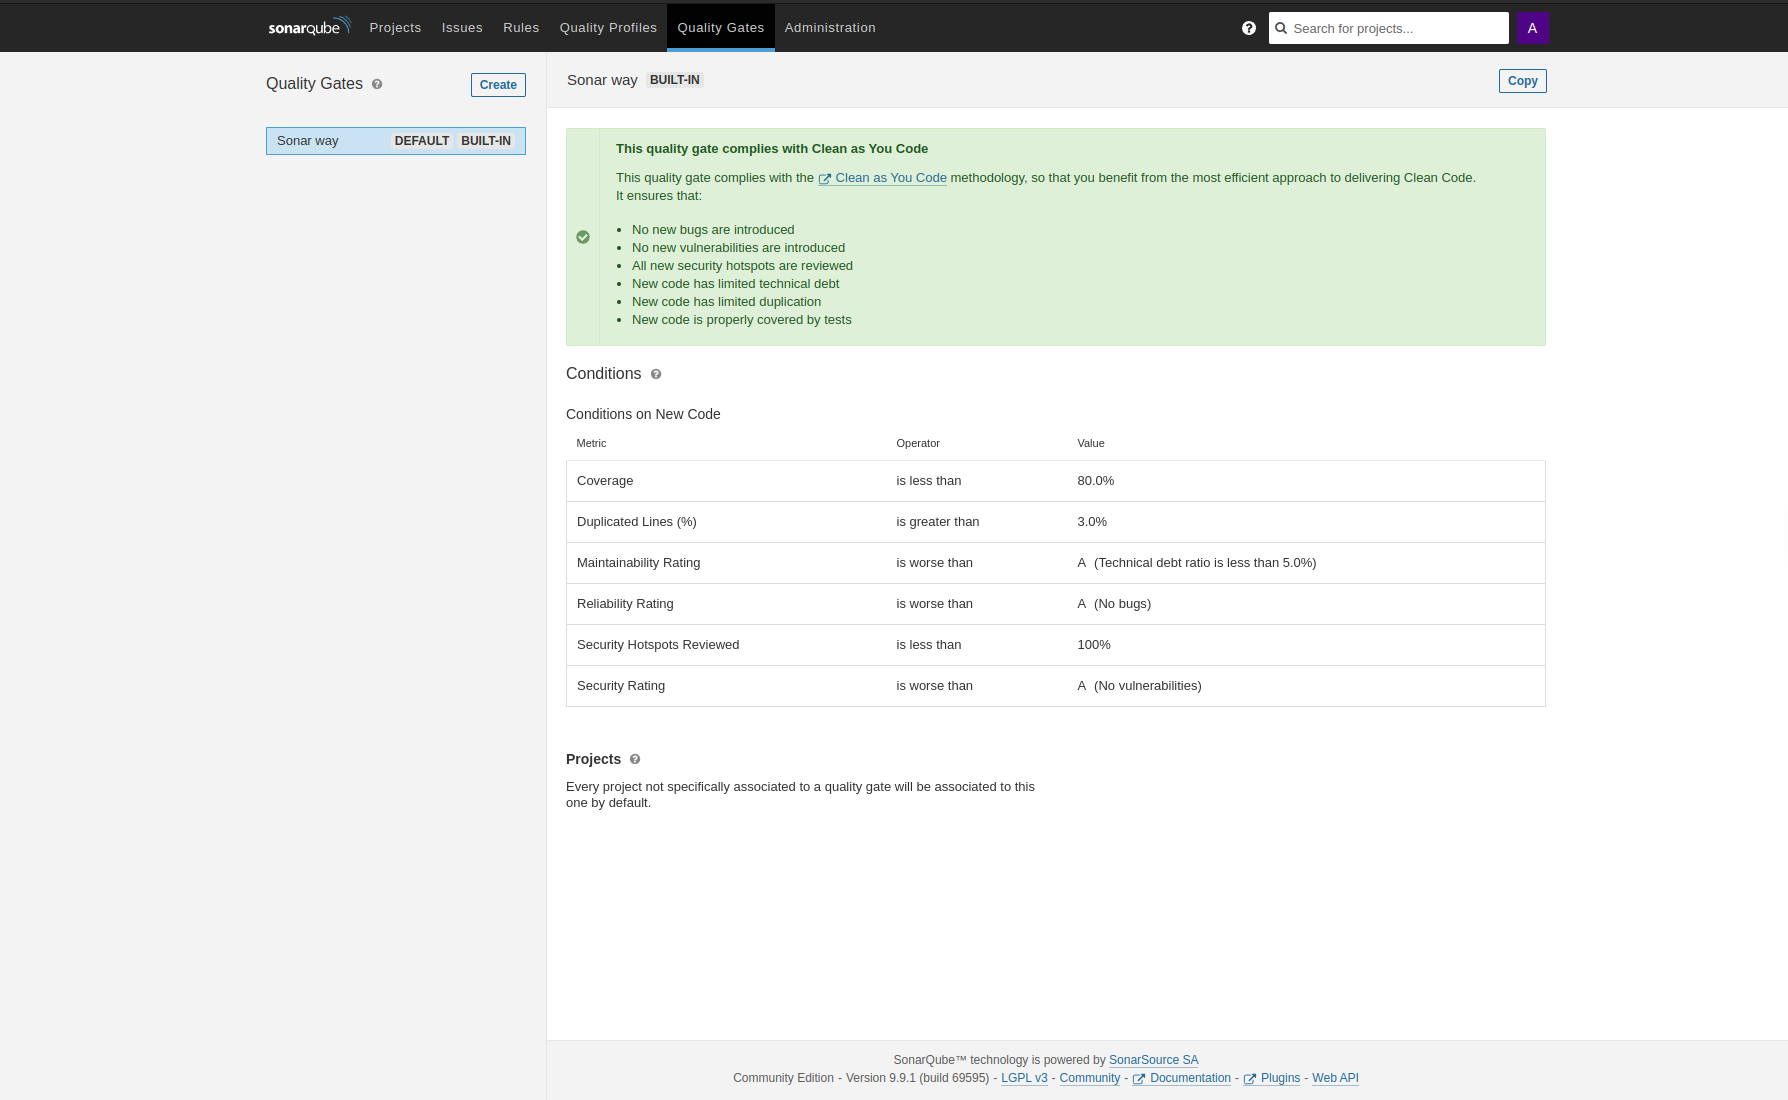
It is up to you to select the metrics you want to use and to find appropriate limits. If they are too restrictive it will be difficult to advance in the project. If they are too weak they are expendable.
In order for the Sonar analyses to be displayed on the respective PR or commit in the SCM Manager, it is necessary to install the Sonar plugin in the SCM Manager. This can be done in the Administration tab under Available plugins in the right-hand menu bar. You will find the plugin in the Continuous Integration section.
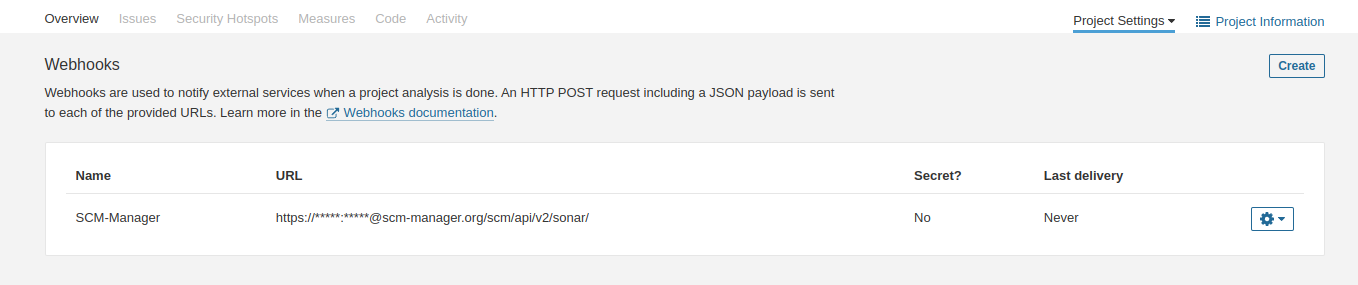
Communication between Sonar and SCM Manager takes place via webhooks. These can be defined per project or per organization and must be stored in SonarQube accordingly (per project or per organization) in the settings.
Automated code reviews improve quality
By implementing this automated code review process you immediately get feedback about whether your code can be built, the success of your unit tests and the compliance with your own code metrics and key figures. In the beginning it may take some time to find a good balance between restriction and redundancy of your metrics. Over time, they can be adjusted to improve the quality of your code.
Try the automated code review yourself
If you don’t have a Cloudogu EcoSystem of your own yet, learn more about it.
Cloudogu EcoSystem
Convince yourself of the advantages of the Cloudogu Ecosystem. Use the modern DevOps platform now for free.
Learn more about it

