


12/22/2014
in EcoSystem
Group Permissions in SCM-Manager Universe
Table of Contents
+++This post was migrated from our former blog about SCM-Manager Universe. Therefore, the design is slightly different and some information might not be 100% applicable to Cloudogu EcoSystem. So don't be alarmed; enjoy reading.+++
Depending on your team size, project structure and requirements, it can be very useful to grant permissions on the basis on groups, not for single users. Using user groups can save a lot of time when setting up a new project, or when a new member joins a team. Therefore we want to show you how you can implement your own groups in SCM-Manager Universe.
Group Management
In all development applications of SCM-Manager Universe, excluding Bugzilla, it is possible to grant permissions on a group basis. This enables an authorization structure where new users gain access to the tools immediately after the users were created. The only necessity is to assign the groups to the new user.
Default Groups
With release 14.11 – Electra we implemented three default groups in SCM-Manager Universe. One for administrative, one for write and one for read permissions. With those groups it is very easy to get started. If you want to add your own group permissions, you only need to provide permissions to your group in the applications after creating it in the tool User Management. The 3 default groups provide permissions corresponding to their name:
- universalAdmin
- universalWrite
- universalRead
Those groups are configured for Jenkins, SCM-Manager, Sonatype Nexus and SonarQube.
If you want to use your own group permissions you need to create the groups and configure their permissions in the applications. Continue reading to learn about the configuration.
Tool Configuration
Add a new Group
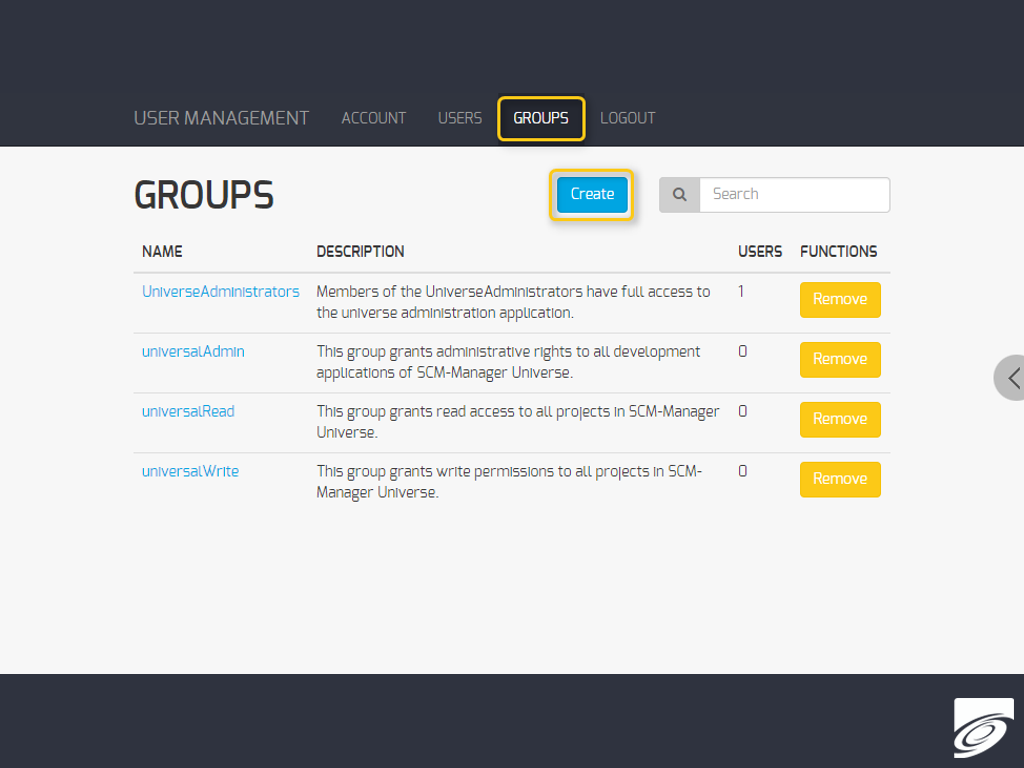
To provide permissions to a group you should firstly add the group in our User Management application. Log in as admin, click on Groups and provide the name.
After that you can start granting permissions to this group in the development applications.
SCM-Manager
In SCM-Manager you only need to add a group with the identical spelling as in User Management. In the permissions tab of the group you can add global permissions. You also can provide permissions individually for each repository.
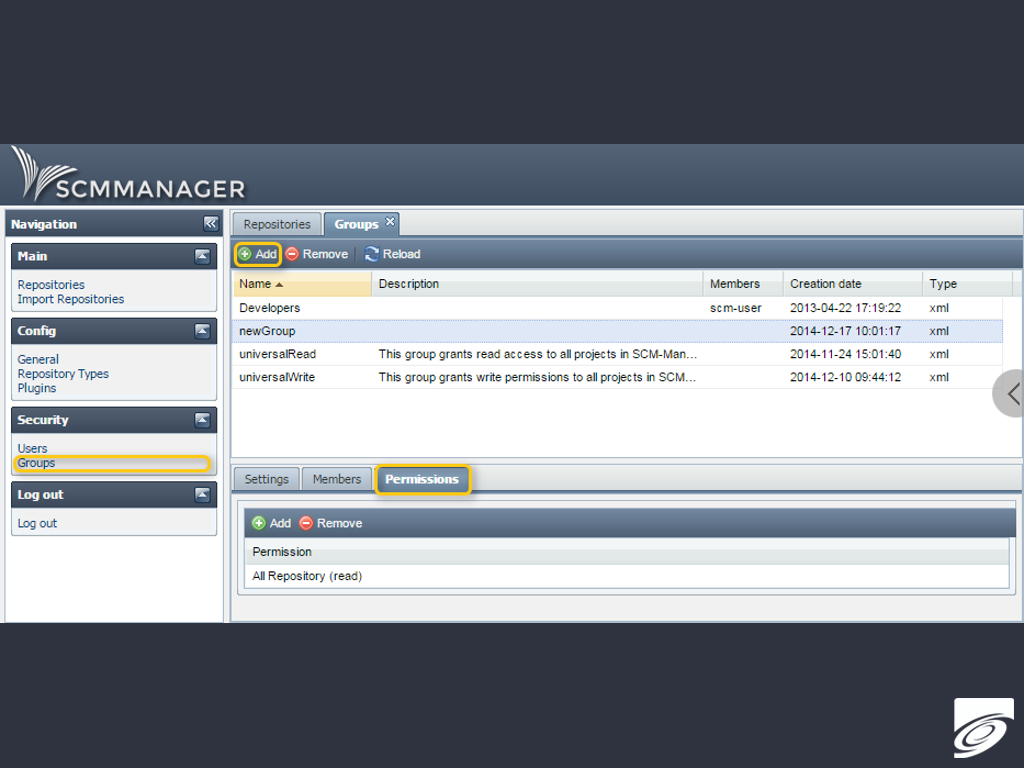
If you want to grant administrative rights to a group you can do that in the “Config → General“ screen.
Jenkins
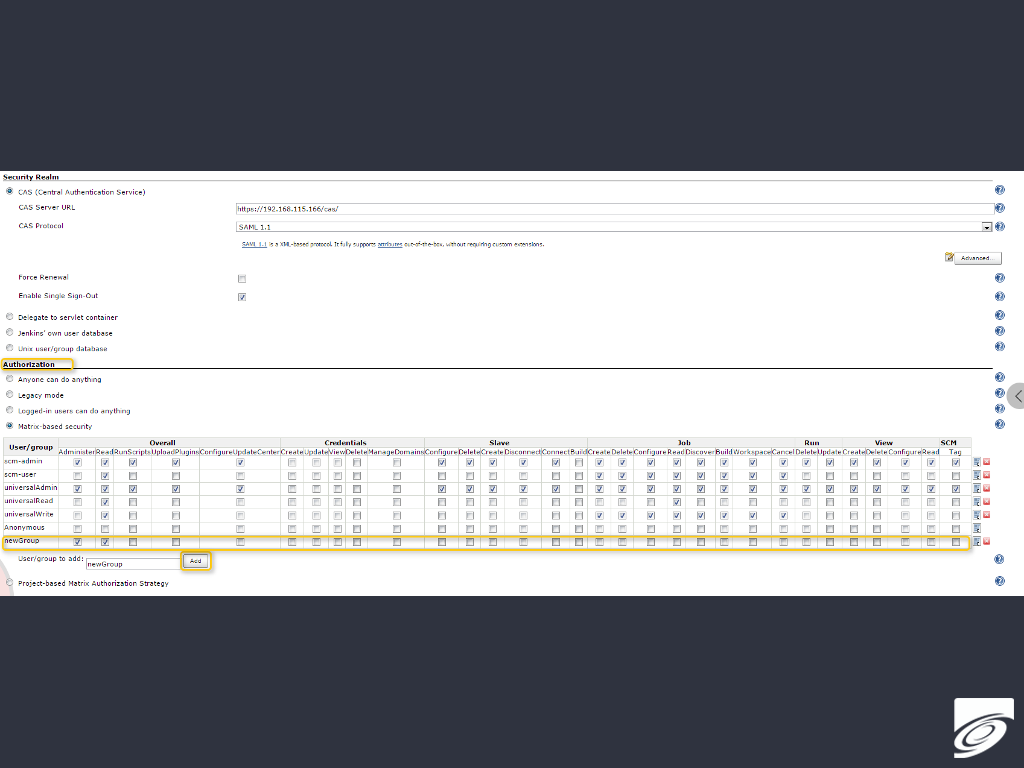
In Jenkins it is also very easy to grant permissions to a group. You only need to add the group to the authorization matrix in the “Manager Jenkins → Configure Global Security” screen. Again the spelling needs to be the same as in User Management.
Sonatype Nexus
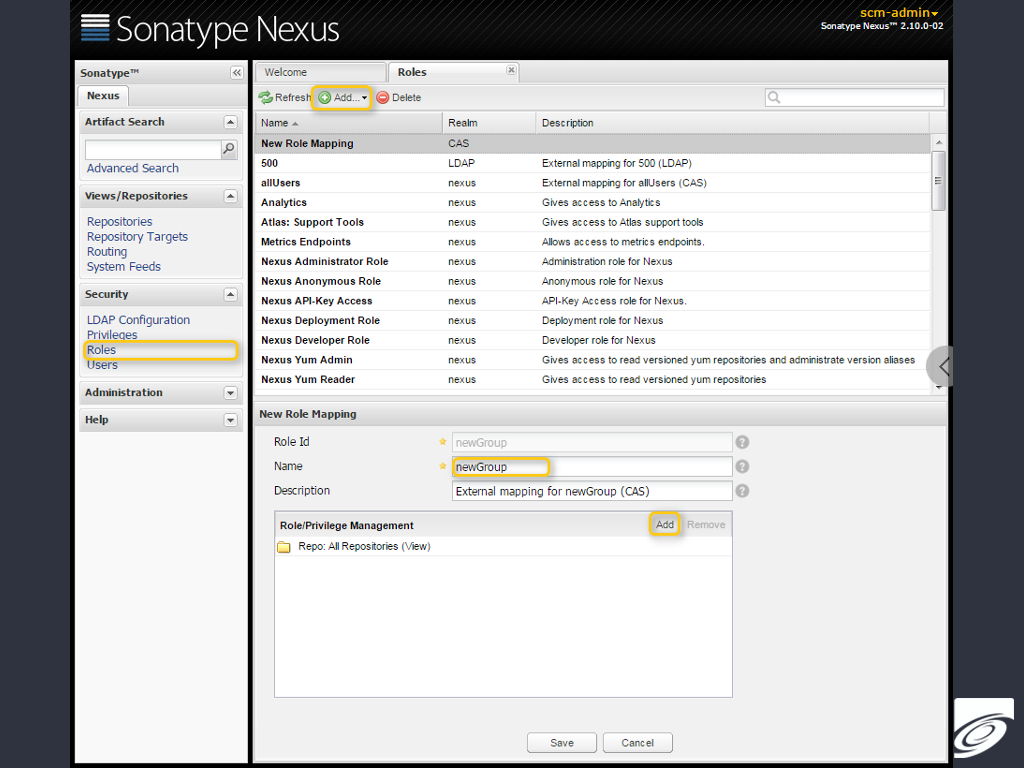
To implement group permissions for Sonatype Nexus you need to map the groups from User Management with roles of the application. This can be done in the “Security → Roles” screen. There you have to click on Add and External Role Mapping. Select CAS in the appearing dialogue box and provide the name of group from User Management. After that you can add permissions to the new role.
The group permission configuration of SonarQube is a bit special. It either only allows external or internal roles.That means that all internal roles of SonarQube will be removed once the external groups were activated. Therefore you should firstly add permissions to the groups from User Management and then activate the group mapping.

- Add the group to SonarQube: Go to the “Settings → Security → Groups” screen and add the new group there. The spelling needs to be the same as in User Management.
- Grant permissions to the group: You can either grant global permissions or project specific permissions, simply by adding the group in the corresponding Groups columns.
- Activate the group mapping:
- Log in as admin to the shell of your SCM-Manager Universe.
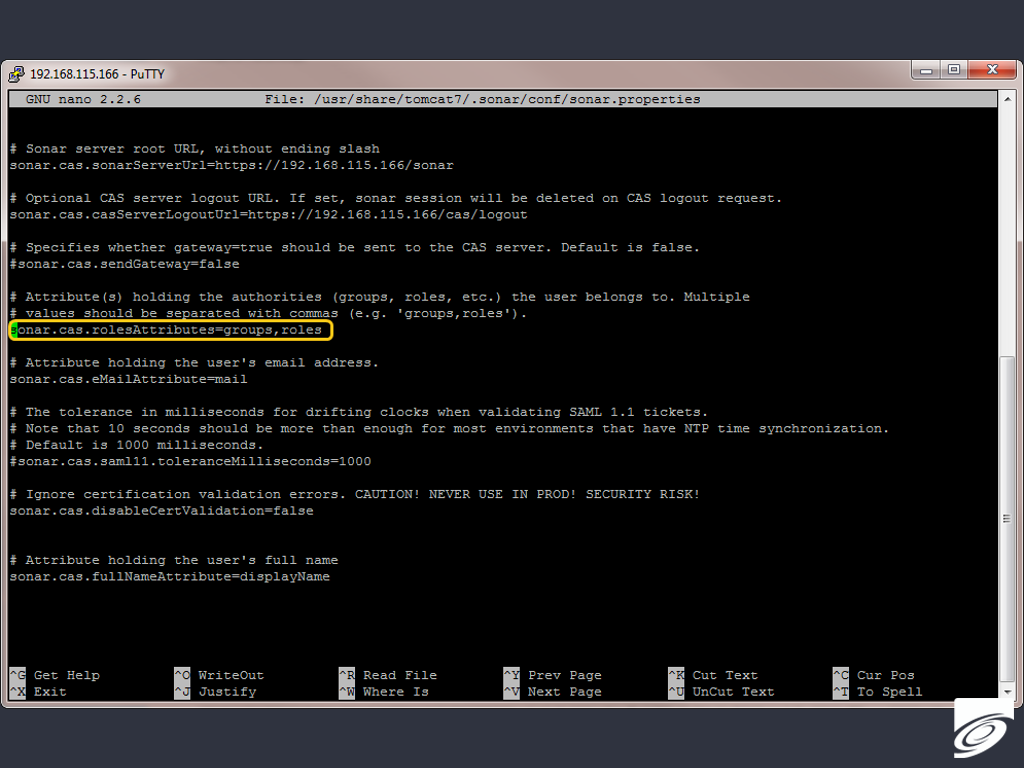
- Open the configuration file:
sudo nano /usr/share/tomcat7/.sonar/conf/sonar.properties - Go to the end of the text, to “CAS configuration”, and modify the section to make it look like this:
# Attribute(s) holding the authorities (groups, roles, etc.) the user belongs to. Multiple# values should be separated with commas (e.g. 'groups,roles').sonar.cas.rolesAttributes=groups,roles
Conclusion
It is very easy to add permissions to groups in the different applications. Especially for large teams or quickly changing members or permissions it is useful to use groups for authorization. Even for teams with very specific permissions for each user it may be helpful as soon as there are a few users that need identical rights.
With kind regards, your SCM-Manager Universe team
SCM-Manager
The easiest way to share and manage your Git, Mercurial and Subversion repositories.
Getting started

