


11/12/2015
in Technology
Automatic Cloud Provisioning with Terraform – Part 2
Table of Contents
+++This post was migrated from our former blog about SCM-Manager Universe. Therefore, the design is slightly different and some information might not be 100% applicable to Cloudogu EcoSystem. So don't be alarmed; enjoy reading.+++
Using standardized rollouts for virtual machines in a cloud infrastructure has several benefits in software development to improve your performance. In the first part of our post we introduced the general advantages and explained the basic setup of Terraform. Now we will show you a basic configuration for the infrastructure and access rules that you can use as a basis for your first instances.
After we showed the basic setup in the first part) we now continue with the configuration of the infrastructure and the deployment.
Infrastructure and Access Rules
The infrastructure that will be used for deploying the templates and their access rules will be defined in a new file, called “main.tf”. In the following we will take a look at each section of the file.
1 – Keys
Get the keys we defined in ‘variables.tf’
# Configure the CloudStack Provider
provider "cloudstack" {
  api_url = "${var.cloudstack_api_url}"
  api_key = "${var.cloudstack_api_key}"
  secret_key = "${var.cloudstack_secret_key}"
  timeout = 300
}
2 – Virtual Private Cloud(VPC) Zone
If you already hava a VPC zone you can use that one, otherwise you have to set up a new one.
resource "cloudstack_vpc" "kubevpc" {
  name = "kubevpc"
  cidr = "192.168.0.0/16"
  # vpc_offering = "Default VPC Offering"
  vpc_offering = "c74113ec-f7f4-4d77-aa21-a3a7cff283ba"
  zone = "swiss1"
}
As you can see, there are 2 ways you can access definitions. The first is naming them like vpc_offering = “Default VPC Offering” and the second by calling them by their id. We had some issues with the named call probably because of problem with blank spaces in the names.
3 – Creating an ACL
In order to manage the access to a machine you can maintain a AccessControlList.
resource "cloudstack_network_acl" "kubeacl" {
  depends_on = ["cloudstack_vpc.kubevpc"]
  name = "kubeacl"
  vpc = "${cloudstack_vpc.kubevpc.id}"
}
4 – Network Segment
Create the network segment in which your instances will spawn.
resource "cloudstack_network" "kubenet" {
  name = "kubenet"
  display_text = "kubenet"
  cidr = "192.168.1.0/24"
  #network_offering = "Offering for isolated VPC networks - \
  #                    with external LoadBalancer"
  network_offering = "66791b93-a963-4fab-83a3-0407d09f535d"
  vpc = "${cloudstack_vpc.kubevpc.id}"
  aclid = "${cloudstack_network_acl.kubeacl.id}"
  zone = "swiss1"
}
5 – Content for the ACL
Time to provide the ACL with some simple content. As you can see we define a default allow rule for tcp and udp traffic in- and outbound which is quite unsecure, but this is just for testing.
resource "cloudstack_network_acl_rule" "kubeaclrule" {
  aclid = "${cloudstack_network_acl.kubeacl.id}"
  rule {
        action = "allow"
        source_cidr = "0.0.0.0/0"
        protocol = "tcp"
        ports = ["1-65000"]
        traffic_type = "ingress"
  }
  rule {
        action = "allow"
        source_cidr = "0.0.0.0/0"
        protocol = "tcp"
        ports = ["1-65000"]
        traffic_type = "egress"
  }
  rule {
        action = "allow"
        source_cidr = "0.0.0.0/0"
        protocol = "udp"
        ports = ["1-65000"]
        traffic_type = "ingress"
  }
  rule {
        action = "allow"
        source_cidr = "0.0.0.0/0"
        protocol = "udp"
        ports = ["1-65000"]
        traffic_type = "egress"
  }
}
6 – Deployment
Finally, we are ready to deploy some instances. In this example we are planning two instances for a Kubernetes cluster based on a prebuild template that was prepared earlier as ‘kubebase’.
resource "cloudstack_instance" "kubemaster" {
  name = "kubemaster"
  expunge = true
  service_offering = "1vCPU-1GB"
  network = "${cloudstack_network.kubenet.id}"
  template = "kubebase"
  zone = "swiss1"
}
resource "cloudstack_instance" "kubeminion-1" {
  name = "kubeminion-1"
  expunge = true
  service_offering = "1vCPU-1GB"
  network = "${cloudstack_network.kubenet.id}"
  template = "kubebase"
  zone = "swiss1"
}
7 – Provision IP Address
In order to access our new structure we provide a public ip address.
resource "cloudstack_ipaddress" "public_ip" {
  vpc = "${cloudstack_vpc.kubevpc.id}"
  depends_on = ["cloudstack_instance.kubemaster"]
}
8 – Enable Services
After having a public ip address we can forward ports to our instances to access ssh and other services.
resource "cloudstack_port_forward" "kubenet_port_forward" {
  ipaddress = "${cloudstack_ipaddress.public_ip.id}"
  depends_on = ["cloudstack_ipaddress.public_ip"]
}
forward {
  protocol = "tcp"
  private_port = "22"
  public_port = "2201"
  virtual_machine = "kubemaster"
}
forward {
  protocol = "tcp"
  private_port = "22"
  public_port = "2202"
  virtual_machine = "kubeminion-1"
}
9 – Customization
Here is where customization comes into the game. The preconfigured template image kubebase holds a preseed ssh keypair in order to get access to the instance during rollout. This is necessary to install software on the new instances and configure it. This is better than building new templates for every new update for the software you are using and it gives you the advantage of unifying updates and patches. You could also think of using puppet with foreman to provide the new infrastructure with software and patches.
provisioner "file" {
source = "scripts"
destination = "scripts"
connection {
host = "${cloudstack_ipaddress.public_ip.ipaddress}"
user = "kubeuser"
key_file = "../ssh/terraform"
port = "2201"
}
}
provisioner "remote-exec" {
inline = [
"sudo sed -i \"s/127\.0\.1\.1.*/127.0.1.1Â Â Â Â Â Â
${cloudstack_instance.kubemaster.name} packer-kubebase/g\" /etc/hosts",
"sudo sh -c \"echo ${cloudstack_instance.kubemaster.name} > /etc/hostname\"",
"sudo service hostname restart",
"chmod +x scripts/*",
"scripts/docker.sh",
"scripts/bs-docker.sh",
"scripts/master-prepare.sh",
"scripts/flannel.sh",
"scripts/master.sh"
]
connection {
host = "${cloudstack_ipaddress.public_ip.ipaddress}"
user = "kubeuser"
key_file = "../ssh/terraform"
port = "2201"
}
}
provisioner "file" {
source = "scripts"
destination = "scripts"
connection {
host = "${cloudstack_ipaddress.public_ip.ipaddress}"
user = "kubeuser"
key_file = "../ssh/terraform"
port = "2202"
}
}
provisioner "remote-exec" {
inline = [
"sudo sed -i \"s/127\.0\.1\.1.*/127.0.1.1
${cloudstack_instance.kubeminion-1.name} packer-kubebase/g\" /etc/hosts",
"sudo sh -c \"echo ${cloudstack_instance.kubemaster.ipaddress}
${cloudstack_instance.kubemaster.name} >> /etc/hosts\"",
"sudo sh -c \"echo ${cloudstack_instance.kubeminion-1.ipaddress} > /etc/hostname\"",
"sudo service hostname restart",
"chmod +x scripts/*",
"scripts/docker.sh",
"scripts/bs-docker.sh",
"scripts/flannel.sh",
"scripts/minion.sh"
]
connection {
host = "${cloudstack_ipaddress.public_ip.ipaddress}"
user = "kubeuser"
key_file = "../ssh/terraform"
port = "2202"
}
}
10 – Get Public IP Address
Finally, we make an output of the public ip we just created for this infrastructure
output "public_ip" {
  value = "${cloudstack_ipaddress.public_ip.ipaddress}"
}
So now you have created your infrastructure in Terraform. The next step is to do a dry run by executing terraform plan. This will test your new files and give you an idea of what will be done, if you decide to make a rollout.
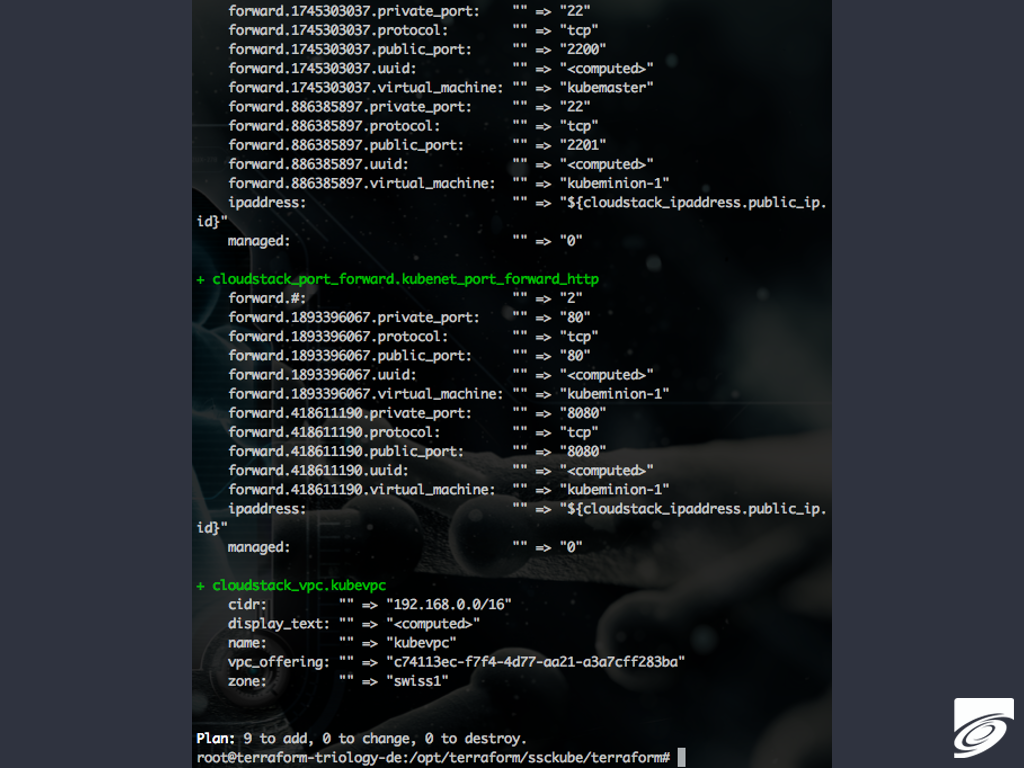
11 – Rollout
If you are happy with this forecast do a rollout by invoking “terraform apply”, which will pretty much look like this:
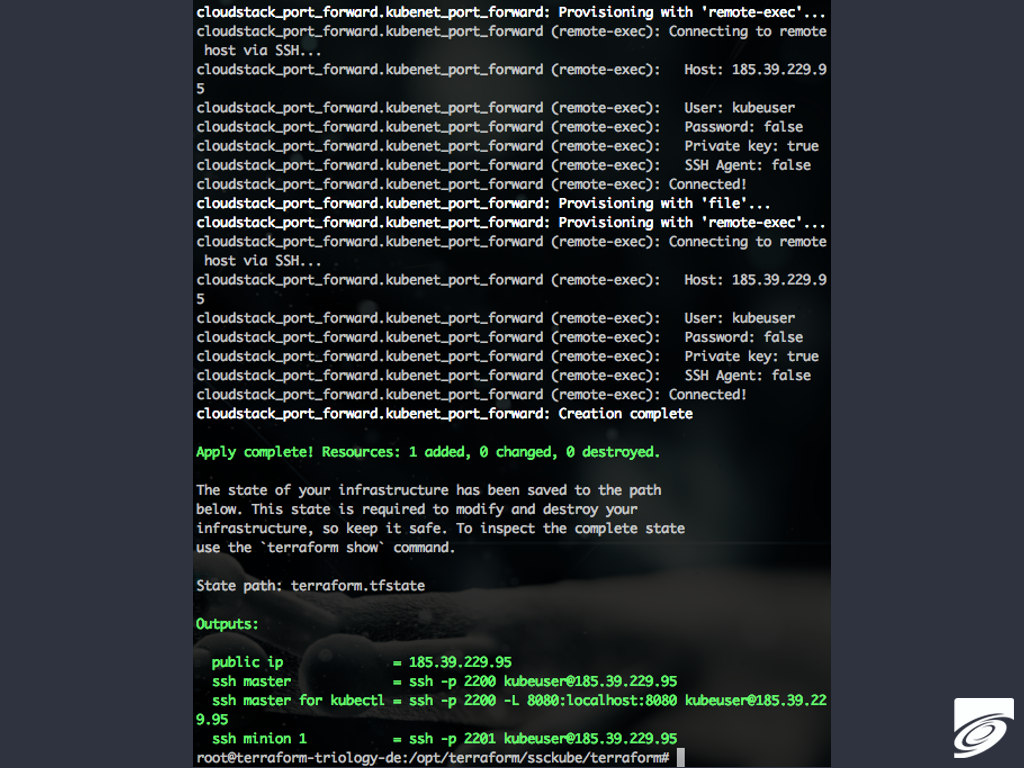

If you are satisfied with your planning and rollout you might think of documentation and making revisions of the it.
Documentation
Being the lucky owner of a SourceCode management system like SCM-Manager you can now check in your CloudStack infrastructure project with all *.tf files, keys and scripts. This might describe your global configuration as well as the (sub)structure of your projects and new commits/changes will be documented by your SourceCode management accompanied by your bug tracker. There might also be a wiki knowledge base holding general descriptions and declarations.
This will help you and your project to introduce new developers, operators and DevOps to get into the topic. Your team will spend less time on the deployment, rollout and standardized testing giving more time to develop or host good software and services.
Conclusion
The described system provides a highly versatile infrastructure which allows you to be flexible and very efficient in provisioning systems for all different parts of your organization. Of course, we only described the foundation, the basic setup, but it has all the prerequisites you need. It´s up to you to create all different kinds of customized virtual machines that fit your needs best.
Best regards, your SCM-Manager Universe Team


