Automatic Cloud Provisioning with Terraform – Part 1
In software development it is very useful to have the ability to make certain systems available on demand, for example for testing, deployment or additional build servers. The important thing about the systems is that they are available quickly and that their configuration and setup is as expected. One way to achieve this is by implementing automated provisioning of CloudStack instances by using the application Terraform.
General
Terraform is a solution that helps us to fulfill automated tasks within a cloud infrastructure, which provides a highly standardized rollout. It combines the management of templates with the ability to use scripts to customize them. The advantage of this is the capability of standardizing patches and updates for the infrastructure without having to fiddle around on every instance to make an update and performing individual testing.
Those standardized virtual machines have certain advantages:
- Testing: Test environments can be spawned on demand and be destroyed when the test run is over. For each run you can use a new, clean, system.
- Development: Provide deployment targets for applications as required. You can automate the deployment process.
- Infrastructure: Start additional build servers when needed.
- Production: Rollout of well-documented and standardized instances
Using Terraform with Apache CloudStack you can enjoy the benefits of an infrastructure like this. Of course, Terraform doesn’t only support this cloud management system but we use it to explain the technological setup.
Setup
In order to set up your Terraform environment there are some requirements to be met and some aspects you should consider.
- First, you will have to check out the current version of Terraform to get the runtime. For that you can go to https://terraform.io/downloads.html and download it for your platform, or you can fetch the sources from https://github.com/hashicorp/terraform and build it. We decided to build it by ourselves because we had problems with timeouts that came a little too soon, so we modified the code according to our needs.
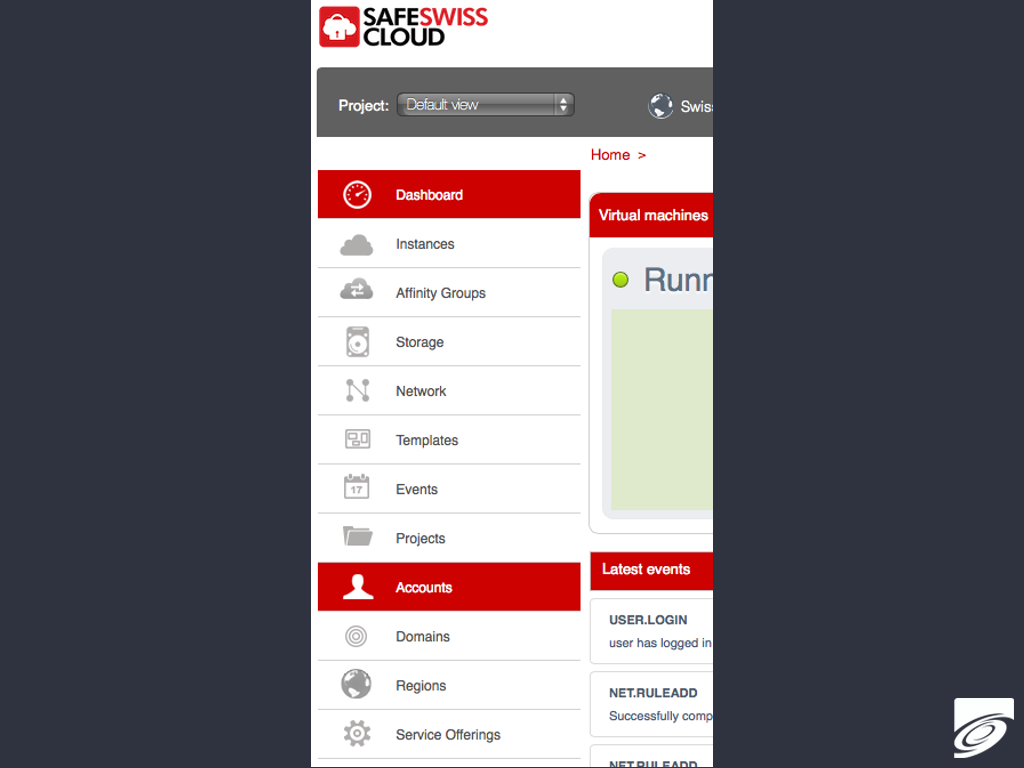
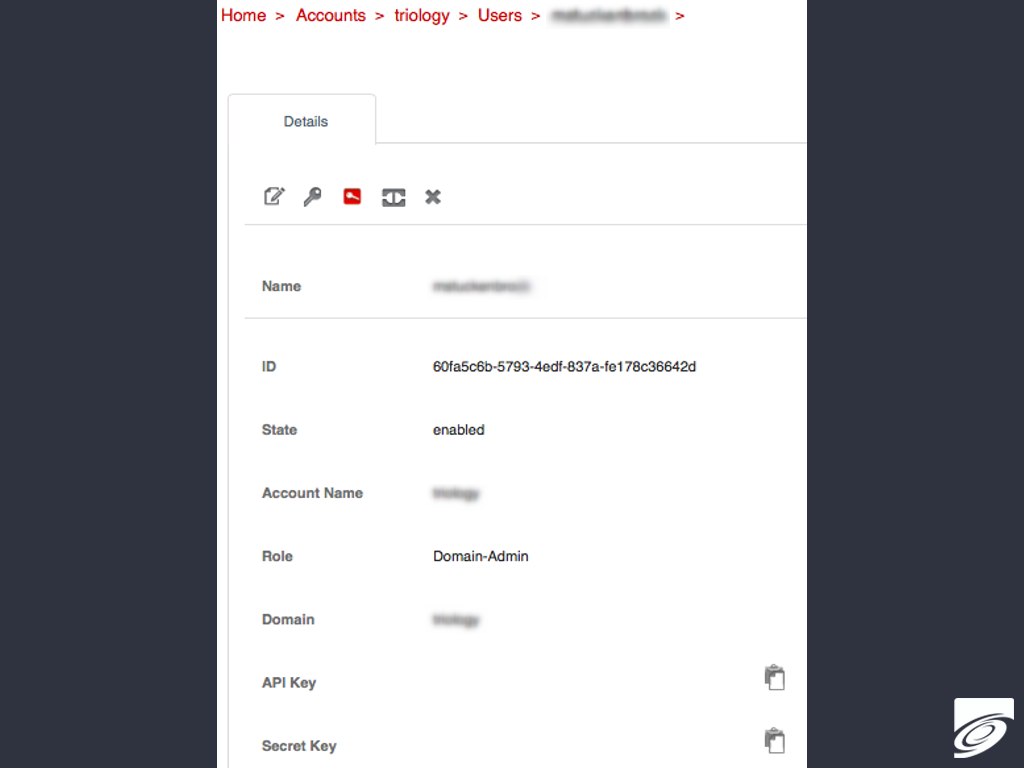
- After having done the setup of Terraform, you will have to acquire the API keys to access your CloudStack. You can get them by logging in to your Cloud and going to Accounts.
- After that you can choose your configured domain and access the keys of the users you created within your cloud. In some setups the keys have to be generated, because they were not created automatically on creation of the user. These keys are needed to use the API of CloudStack.
- Create your first config file in Terraform, let’s name it “variables.tf”. It looks like this:
variable "cloudstack_api_url" {
  description = ""
  default = "https://swiss1.safeswisscloud.ch/client/api"
}
variable "cloudstack_api_key" {
  description = ""
  default = "ABCDEFGHIJKLMNOP_42_1337_23"
}
variable "cloudstack_secret_key" {
  description = ""
  default = "XPQ21!BBQ4PR3$ID3NT111!!111!"
}
After you completed these steps you are ready to provision your first instances with Terraform. To do so you will have to define some infrastructure and access rules. We will provide a sample configuration in the second part of this post.
Conclusion
In this first part of our post about automated cloud provisioning we showed you why it is beneficial to set up Terraform and how you can do it. In the second part of this post we will show you a sample configuration for your first instances.
With kind regards, your SCM-Manager Universe Team


