


04/25/2013
in Technology
Getting started with EGit
Table of Contents
+++This post was migrated from our former blog about SCM-Manager Universe. Therefore, it is only available in English.+++
Eclipse is one of the widest spread multi-language software development environments (IDE) that has an extensible plugin system to nearly every existing version control system. This article introduces briefly the installation and the usage of EGit as a standard interface connecting Eclipse and Git repositories. Since we do not want to leave out the biggest rival of Git, a second article focusing on MercurialEclipse will follow.
Installation of eGit in Eclipse
Most of the editions of Eclipse after Eclipse “Juno” have EGit installed by default. Users that work with an older version can download the Team Provider at the Eclipse marketplace. Since EGit refers back to the library of JGit, you need to install JGit, too.
As a measure to stay up-to-date, we suggest to put EGit in the list of automatic updates. The appropriate URL website is: http://download.eclipse.org/egit/updates.
Your next step should be to add your committer data to Git under Team → Git → Configuration → UserSettings. After clicking Add Entry insert the standard keys user.name and user.email. If you don’t configure it yourself, EGit will use the data of your first login as default values. For experienced users the settings are also saved and editable in the ~/.gitconfig-file.
As your last step you should activate the toolbar for Git under Window → Customize Perspective, because it enables you to quickly access the Git features.
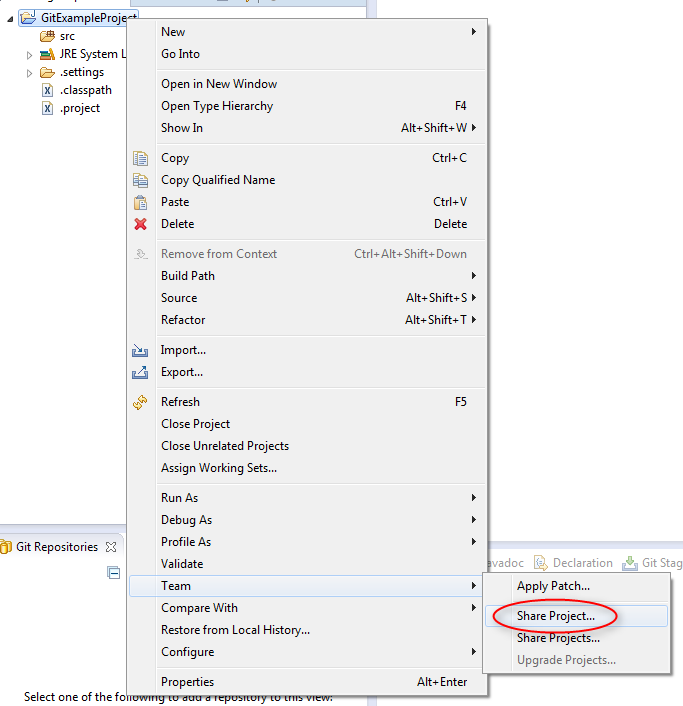

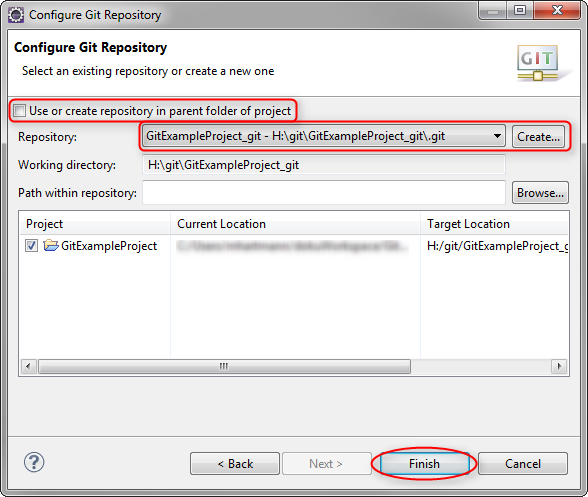
Now chose your project and create a repository. If your project is already registered in one repository, it is automatically selected. If you want to create a new repository, click Create. Press finish and you are ready to work with Git.
EGit offers the options to create a new repository in the parent folder of the project or place it wherever you want. Using the Create button the default Git-folder is appointed.
Even if it´s possible we recommend you not to save the repository to the folder of your project. If this folder is corrupted you can always fall back to the version you commited last.
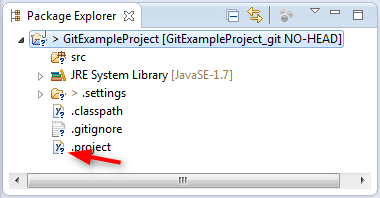
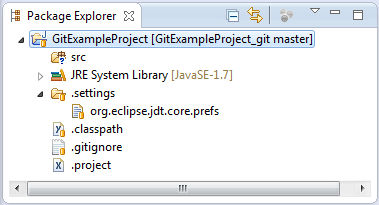
If everything went well you should see the little icons in the navigator which indicate that the project is tracked by a version control system. The string in the box brackets indicates additional information like the name of the repository and more.
Now, it is time to clarify which files you want to use in Git.
.gitignore
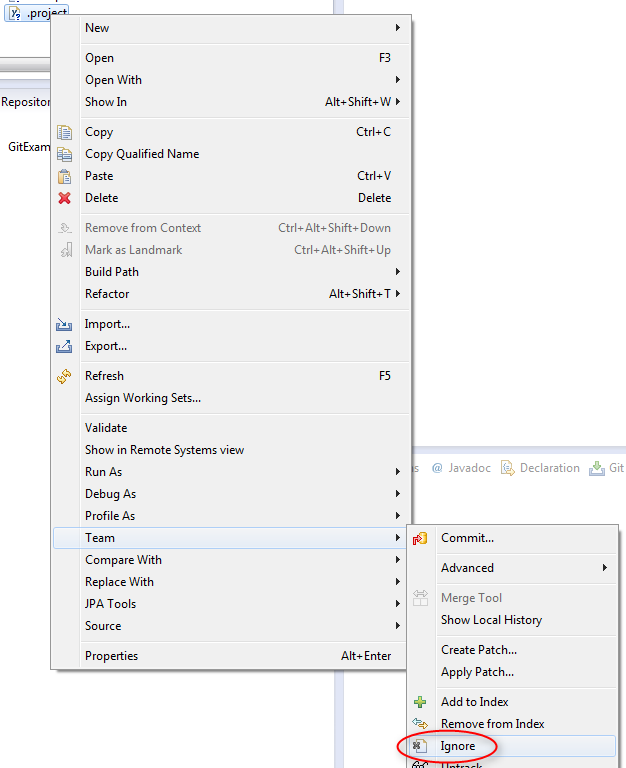
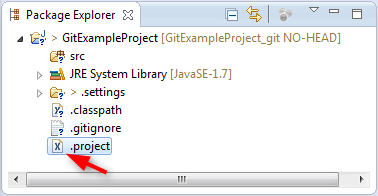
Usually there are some files you don’t want to include in version control. This is where .gitignore comes into play. It is a single file that lists all data which shall be excluded from version control. Using this you can exclude every type of file you want with a single default setting. For example, in the majority of cases it is not necessary to include the /bin-folder or the .project-file of your Eclipse project so we will use this as an example of how to ignore files.
The easiest way to add single files to the .gitignore is to use:
right-click on the file or folder → Team → Ignore
.gitignore can do much more than single files, you can add regular expressions to arrange rules in order to exclude certain files:

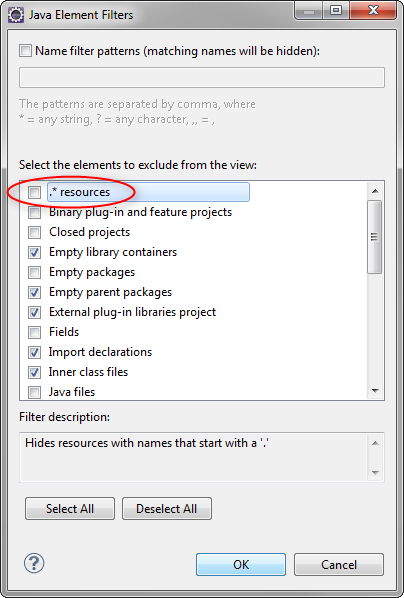
To display the .gitignore-file it might be necessary to change the filter-rules of the package explorer:
If the .gitignore-file is not included in the repository by default add it by right-clicking the project: Team → Add → .gitignore
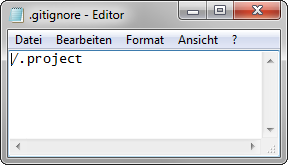
If you open the file now you can simply add files to the ignore list by typing their path and name in a new row, the files you add via Team → Ignore will be listed here, too.
Now that you have declared the repository and told Git which files you want to add to version control and which ones you want to ignore, you are now ready to do your first commit.
Commit data to Git and SCM-Manager
A commit is created by right-clicking the project or file, then Team → Commit. In the “Commit”-dialog you can add a short message to sum up the changes you have made, you can identify the author and committer (they do not have to be identical and are automatically detected from the .gitconfig-file) and you can arrange further settings. Furthermore all the respective files can be chosen, by marking “show untracked files”.
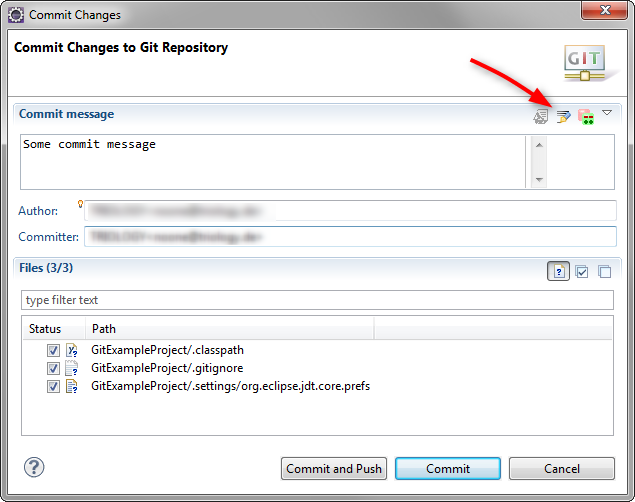
Finally select Add signed-off to approve changes in the commit. This setting is very interesting for certain workflows and can be used by external build servers.
If you confirm the commit, the symbols in the Package-Explorer change, to show that the changes have been conducted.
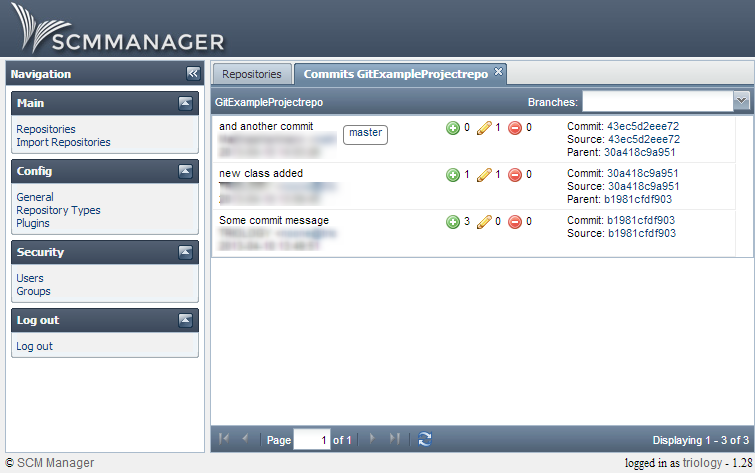
History of Repository
In Team → Show History you have access to the history of a resource. This includes complete projects, single files and folders. The labels at each commit show which branch they belong to. Head marks the latest version.
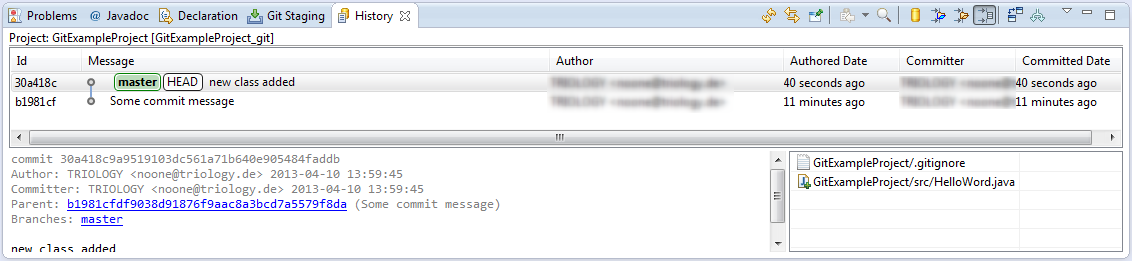
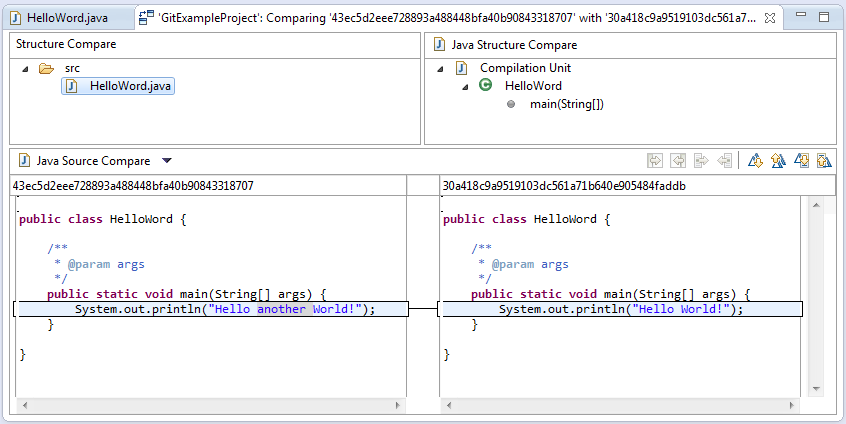
This view is especially useful to get an overview about the evolution of a file or a complete project. Moreover it gives you the possibility to compare different versions by clicking on Compare Mode.
Push changes to SCM-Manager
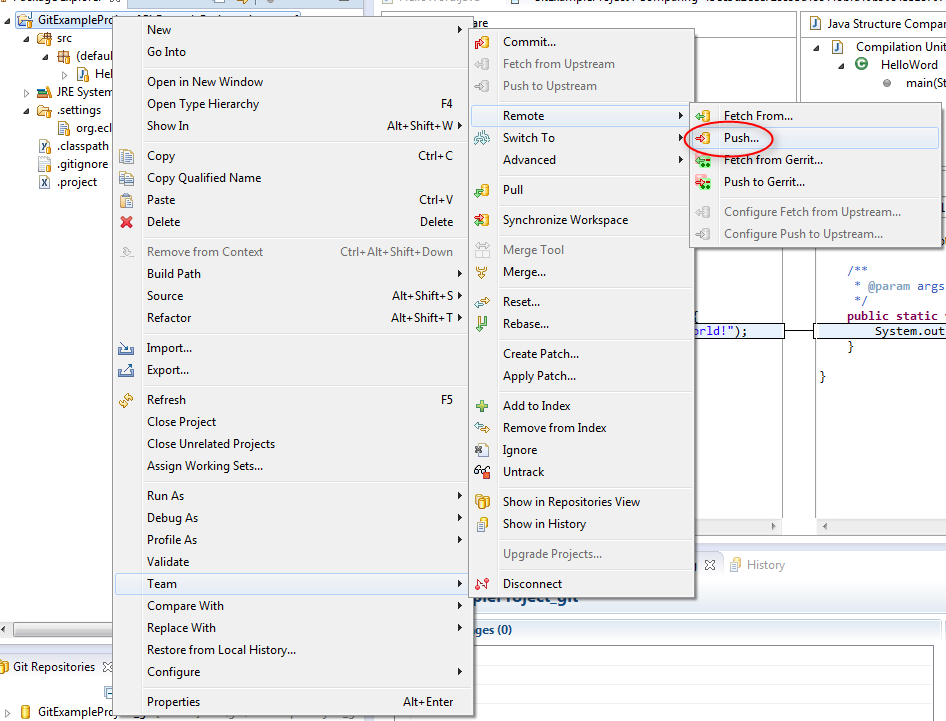
After you implemented all your changes and had a look at the history, you can transmit your local changes to a remote repository. This final step is necessary to share your work with your colleagues. To push it to your them select Team → Remote → Push from the context menu of your project. In the following dialog you need to add the position of the target repository and enter your personal login. After confirming all changes are transmitted and united with the remote repository. When no conflicts occur your job is done. How to deal with merging conflicts will be a new topic in one of the next blogs. So stay tuned.

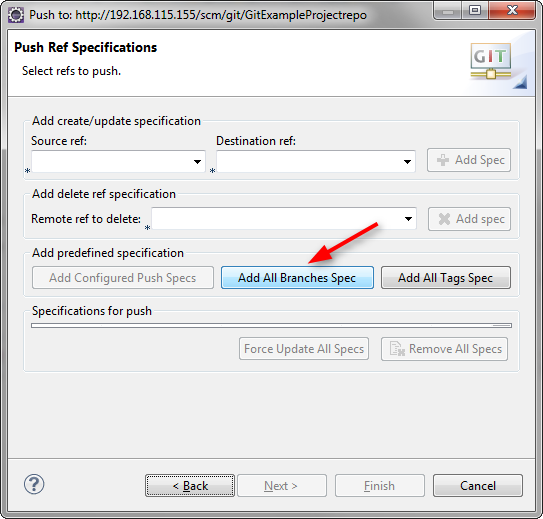
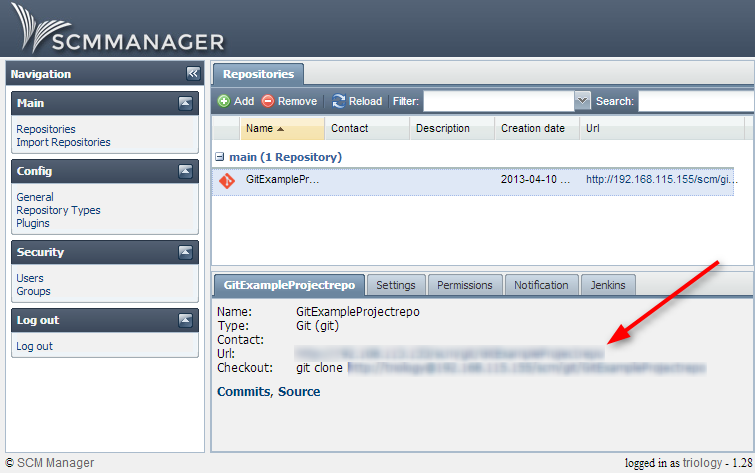
Normally the login data is provided by the administrator. As user of SCM-Manager you can simply look it up on the web interface and copy it directly from there.
Git and SCM-Manager
Congratulations! You have just mastered the basics of version control with Git using EGit. For most requirements this introduction should be sufficient for a start. However to stay up-to-date we recommend you to regularly check our website and this blog where we will publish useful tips & tricks that facilitate your daily work with Git. You should also think about using SCM-Manager for your Source Code Management, because it not only allows you to easily host and manage Git repositories, but also different kinds of VCSs at the same time.
SCM-Manager
The easiest way to share and manage your Git, Mercurial and Subversion repositories.
Getting started

