SourceCode Management for Git, Subversion and Mercurial
Do you strive for something smart and efficient to manage source code? You are excited about the great tool, SCM-Manager, but you are not an expert in source code management yet?
We will explain you, how to get started with SCM-Manager step by step.
Source Code Management with SCM-Manager
SCM-Manager enables you to manage your source code and repositories in an easy way. The default user is already configured as “scmadmin” (Password: scmadmin).The user scmadmin is a local xml user of the application itself.
How to manage local users
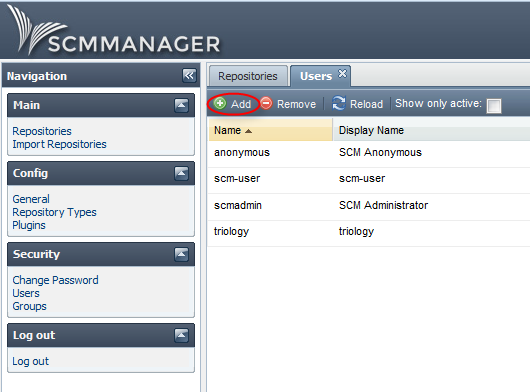
In this part we will have a short look at creating a local user in SCM-Manager. In order to create a new local user you have to click “Users” in the menu on the left side. A new user is now created by clicking “Add”.
After that you can fill in the information about the new user.
It is also possible to use a LDAP system by installing the LDAP-plugin. This possibility will be described in a later post where the plugin is described in detail.
How to create a repository in SCM-Manager
Now you create your first repository. After authenticating in SCM-Manager the repository tab is already open.
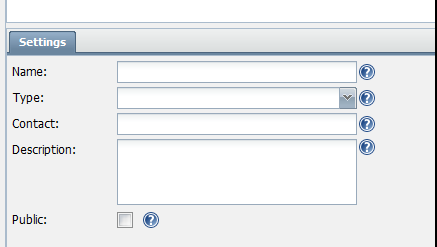
Now click on “Add” to create your new repository as shown in the screenshot. Select a name for your new repository as well as the type. You can choose between GIT, SVN and Mercurial. Furthermore you can provide information about whom to contact and some kind of description. Finally you need to decide whether to set the repository public (network wide readable) or not.
SCM-Manager
The easiest way to share and manage your Git, Mercurial and Subversion repositories.
Getting startedHow to manage rights on your new repository
To manage access rights of users or user groups on your repository click “Repositories” in the main menu on the left. As seen on the screenshot you are now able to select “Permissions”. You may now add access rights to users or groups as shown in the screenshot. After having set these settings the users or groups are able to work with the new gained access rights.
How to install plugins in SCM-Manager
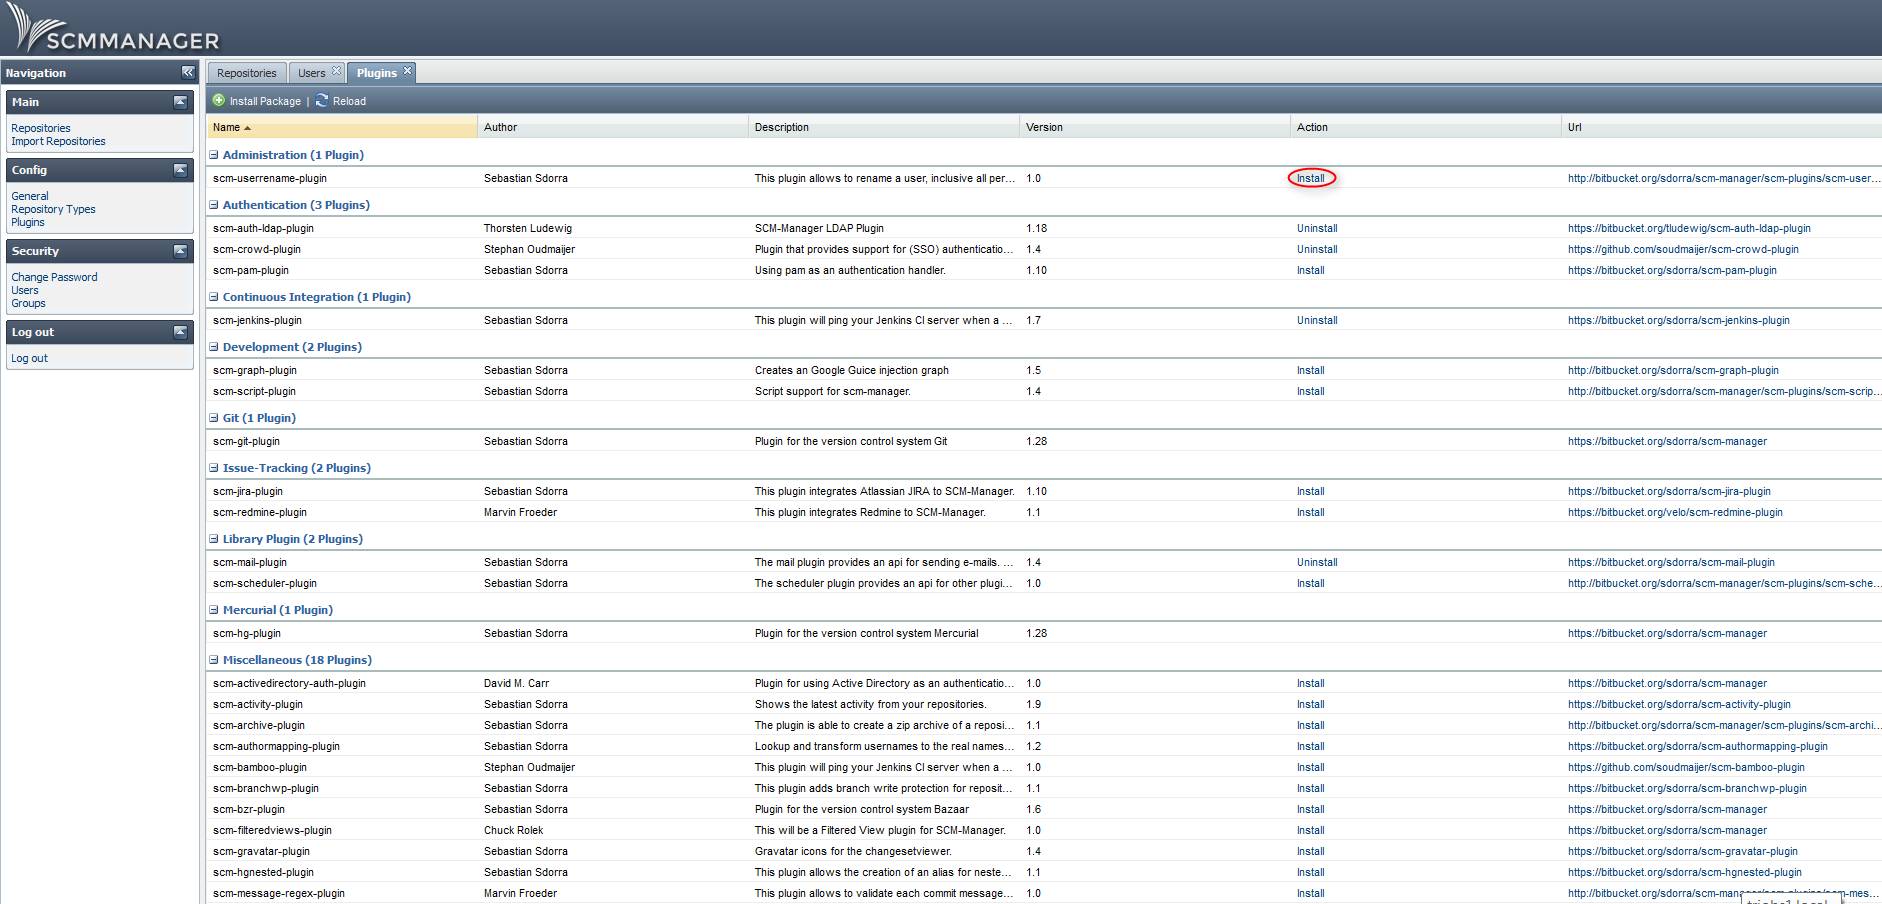
The functionality of SCM-Manager can be extended by using one or more of the numerous plugins. Click on “Plugins” in the configuration menu on the left side. Click on “install” in the action column. Uninstallation of plugins works the same way. Just click the “Uninstall” link. After having installed a plugin you can addapt it to your specific needs by configurating it. If no plugins are shown, you might have to configure a proxy to access the internet. This can be done in the Menu Config > General.
Get your personal product demonstration with us. In only 30 minutes we will answer all your questions and show you the installation and operation of the Cloudogu EcoSystem.


